Issue 12 · Feb 26, 2023 · ~4 min
pyRevit Forms
It's often necessary to get user input in our tools. But creating custom forms with WPF is not beginner friendly. It has very steep learning curve so be prepared to translate a lot of C#.
However, there is an alternative that comes shipped with pyRevit and I want to show you how simple it is to use pre-made forms with pyRevit.
💡 It's already well documented in pyRevit Dev Docs in Effective Inputs, but I want to shine some light on it, so you know where to look and how to use it.
👀 So let's look into forms and how easy it is to use them.
1. Alert
⚠️ Alerts are one of the most commonly used inputs in pyRevit. They are a simple yet effective way to get user input or stop execution of a tool with an alert message.
📃 Alerts can be used to ask Yes/No questions, ask a user to select from a list of options, or simply provide a message to the user with an option to exit scrip execution.
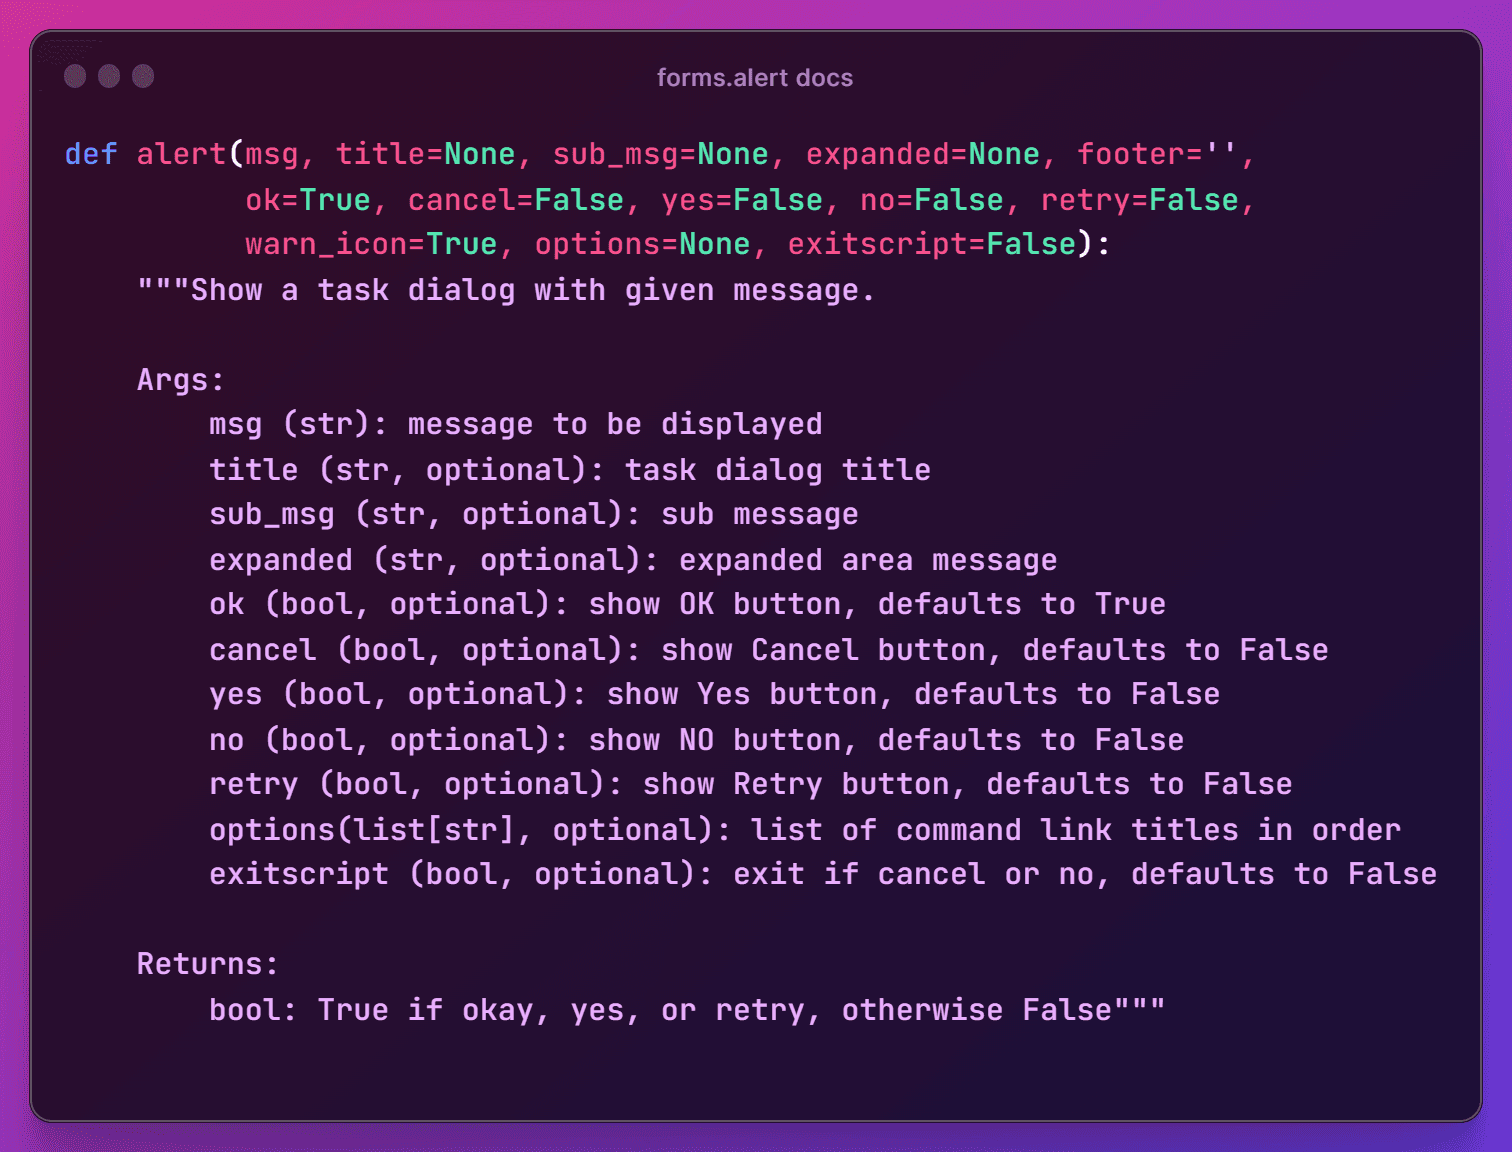
👆 Here is doc string from forms.alert with all available arguments.
Don't get scared! You don't need to use all of them. In most cases I only use msg, title, exitscript and leave all the rest to default values.
Below you will find a few examples on how to use them.
⚠️ Alert + Exitscript
↓forms.alert #1.py
# Stop Execution of the script with an alert message.
from pyrevit import forms
forms.alert("Script Was Cancelled! Pleast Try Again.",
title = 'Custom Title',
exitscript = True)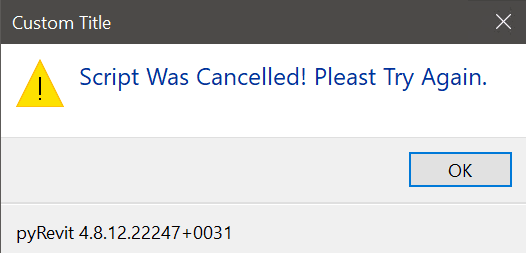
✅ Yes/No
↓forms.alert #2.py
from pyrevit import forms
res = forms.alert("bla-bla-bla. Would you like to proceed?",
ok=False, yes=True, no=True)
if res:
print('Answer: {}'.format(res))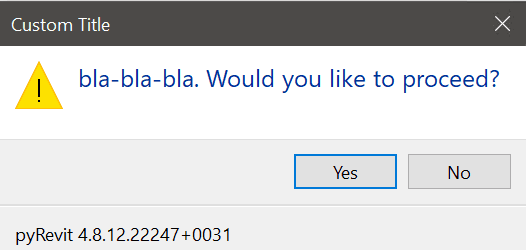
⏹️ Custom Buttons
↓forms.alert #3.py
from pyrevit import forms
res = forms.alert("Choose an option:",
options=["Option A",
"Option B",
"Option C"])
print('Chosen option: {}'.format(res))
if res =='Option A':
pass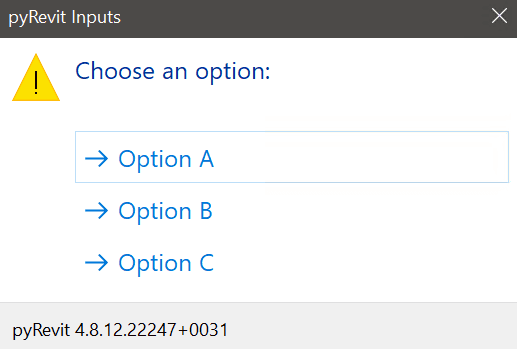
2. WarningBar
⚠️ Warning Bars are a great way indicate to a user that he is supposed to do something.
For example I love using them when I need user to pick some elements. By using Warning Bar you will see an obvious yellow bar on the top with instructions what to do.
↓forms.WarningBar around a pick.py
from Autodesk.Revit.UI.Selection import ObjectType
from pyrevit import forms
selection = uidoc.Selection #type: Selection
with forms.WarningBar(title='Pick an Element:'):
selection.PickObject(ObjectType.Element)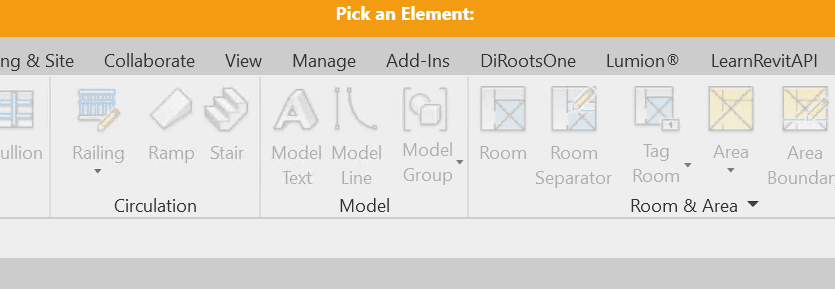
3. Pick File/Path
📁 Once in a while your scripts will need to read or write to a specific file or a folder. It's not complicated to get it with os library in python, but this function in pyRevit is great.
👀 You will see a doc string with all available arguments if you want to dive deeper, but you can keep it simple as I did in my examples below.
📂 Pick File/File
↓forms.pick_file and forms.pick_folder.py
from pyrevit import forms
file = forms.pick_file(file_ext='csv')
folder = forms.pick_folder()
print('Selected File: {}'.format(file))
print('Selected Folder: {}'.format(folder))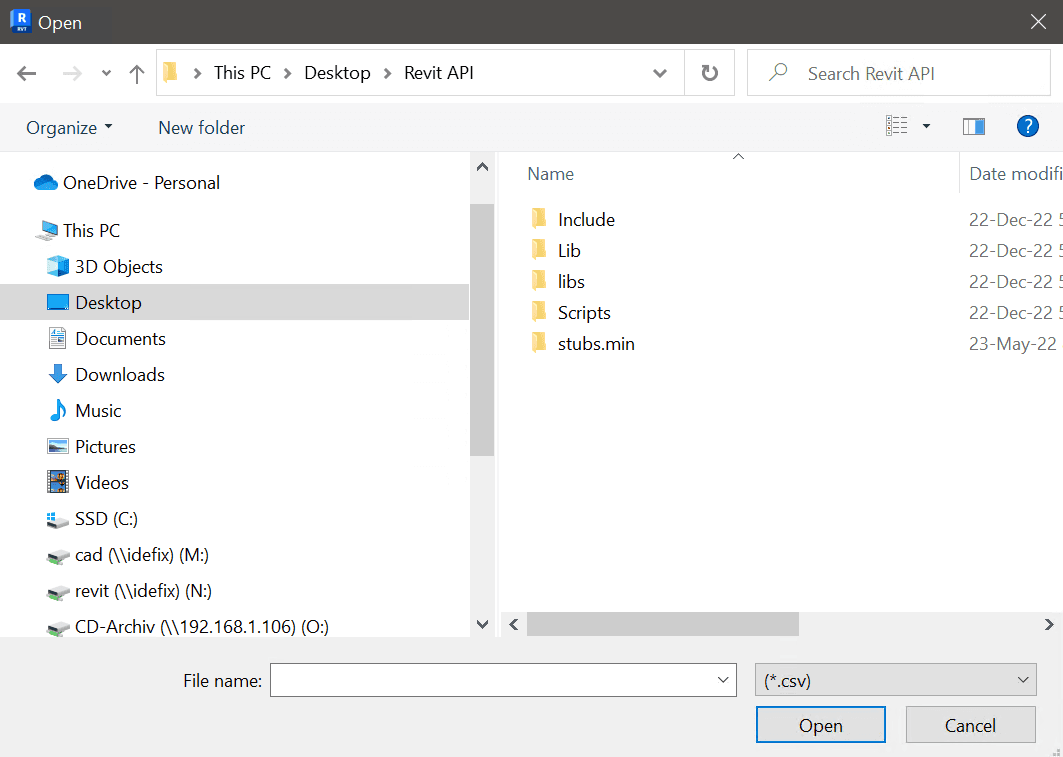
4. Select Forms
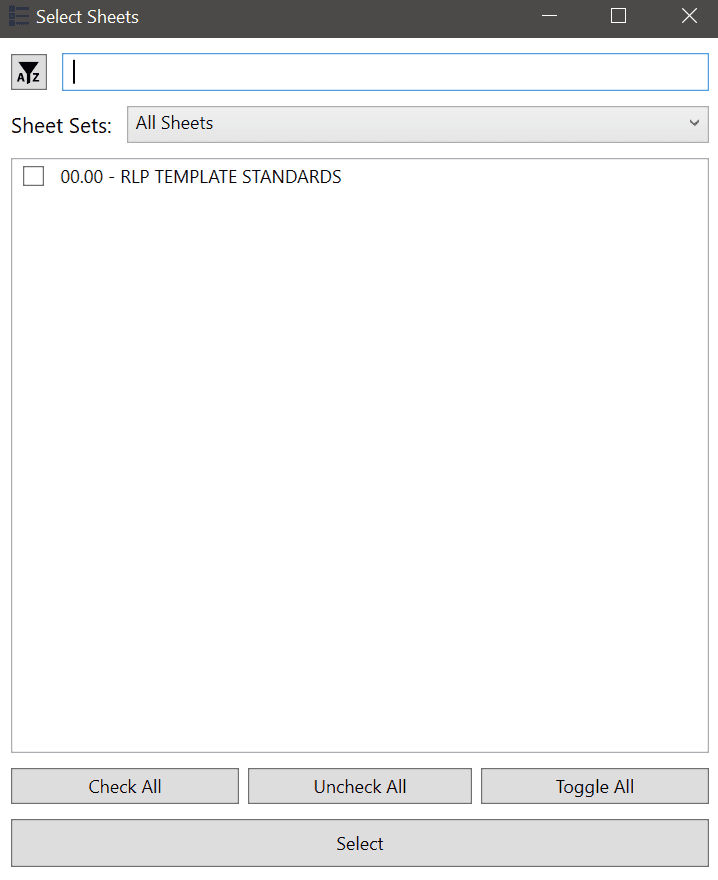
📋 pyRevit has a plenty of forms that will give you a list to choose desired elements such as: Views, Sheets, ViewTemplates, Legends, Revisions, TitleBlocks...
✅ These are really useful and simple to use. With just one line you can create a form with a list of elements for user to choose from.
👇 There are many forms available and you can extend them even more with filterfunc if necessary. I have combined multiple examples into single code, so choose only what you need.
↓Every ready-made select form in one listing.py
from pyrevit import forms
selected_views = forms.select_views(title='Select Views',
button_name='Select',
width=300,
multiple=True,
doc=None,
use_selection=False)
selected_viewtemplates = forms.select_viewtemplates()
selected_schedules = forms.select_schedules()
selected_sheets = forms.select_sheets()
selected_revisions = forms.select_revisions()
selected_titleblocks = forms.select_titleblocks()
selected_parameters = forms.select_parameters(element)
selected_f_parameters = forms.select_family_parameters(family_doc)
selected_doc = forms.select_open_docs(title='Select Documents')
# Add filterfunc
selected_legends = forms.select_views(title='Select Legend Views',
filterfunc=lambda x: x.ViewType == DB.ViewType.Legend)
print('selected_views: {}'.format(selected_views))
print('selected_viewtemplates: {}'.format(selected_viewtemplates))
print('selected_schedules: {}'.format(selected_schedules))
print('selected_sheets: {}'.format(selected_sheets))
print('selected_revisions: {}'.format(selected_revisions))
print('selected_titleblocks: {}'.format(selected_titleblocks))
print('selected_parameters: {}'.format(selected_parameters))
print('selected_f_parameters: {}'.format(selected_f_parameters))
print('selected_doc: {}'.format(selected_doc))
print('selected_legends: {}'.format(selected_legends))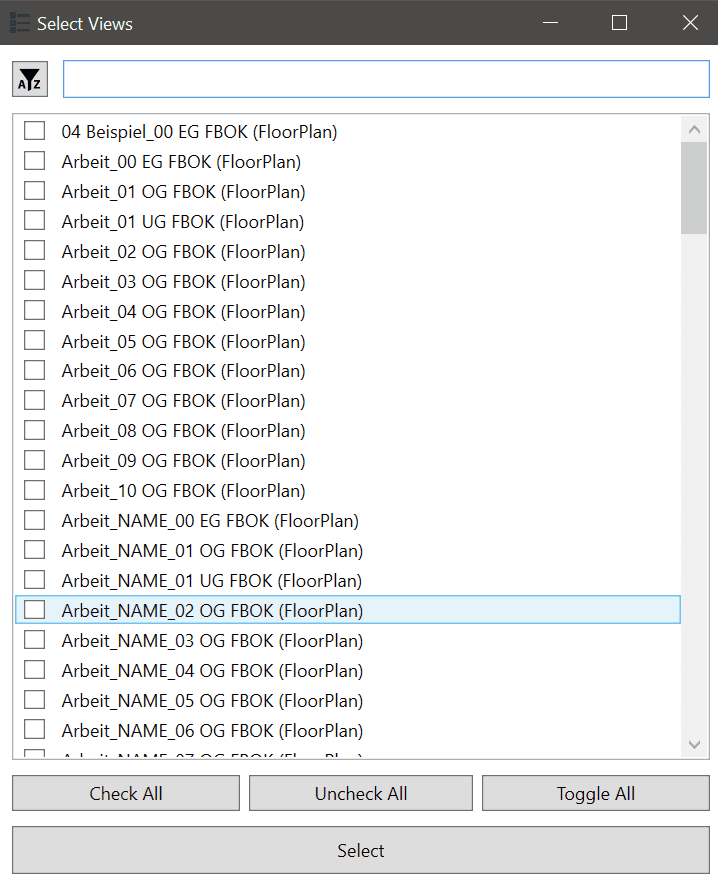
5. Select From List
📃 The SelectFromList input allows the user to select one or more items from a list of options. It's exactly the same form as I show above, but you have more control over what you are showing to user.
There are different ways to use it, but I will show you 2 methods how I used it.
Select From List of Elements
🗃️ If you have a list of elements and you know that you can get names with just a property, you can provide name of that property in name_attr argument.
📰 That will work fine for many elements, however you will get an error if you try to get a .Name of any Type. But, don't worry, I will show you how to use it with dict where we can easily control Names and Elements.
↓SelectFromList over a list of elements.py
from pyrevit import forms
all_levels = FilteredElementCollector(doc)\
.OfCategory(BuiltInCategory.OST_Levels)\
.WhereElementIsNotElementType()\
.ToElements()
selected_levels = forms.SelectFromList.show(all_levels,
multiselect=True,
name_attr='Name',
button_name='Select Levels')
for lvl in selected_levels:
print(lvl.Name)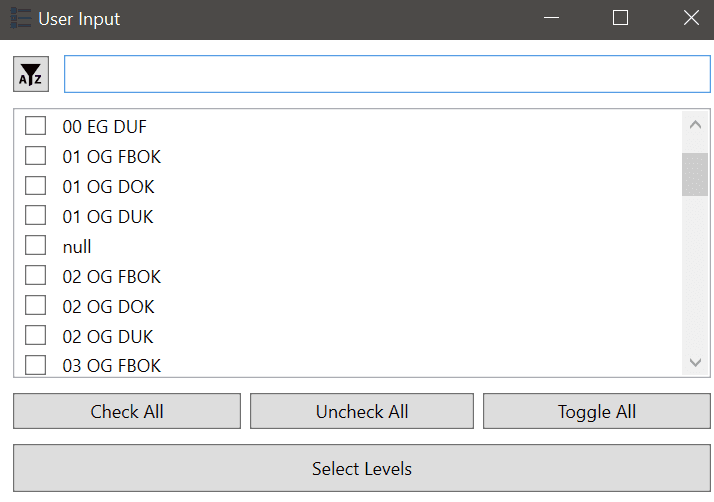
Select From Dict
❌ Once you start using SelectFromList you will notice that you can't get all attributes. It only allows attributes that can get value as a property. (e.g. level.Name)
✅ But Don't Worry! We can create custom dictionary where keys will be visible names of elements in the form, and values are going to be returned elements.
↓SelectFromList over a dict you control.py
all_floor_types = FilteredElementCollector(doc)\
.OfCategory(BuiltInCategory.OST_Floors)\
.WhereElementIsElementType()\
.ToElements()
dict_floor_types = {Element.Name.GetValue(fr):fr for fr in all_floor_types}
selection = forms.SelectFromList.show(dict_floor_types.keys(),
title="Select Floor Type",
button_name='Select')
if not selection:
forms.alert("Floor Type was not chosen. Please try again.",
title='Select Floor Type',
exitscript=True)
selected_floor_type = dict_floor_types[selection]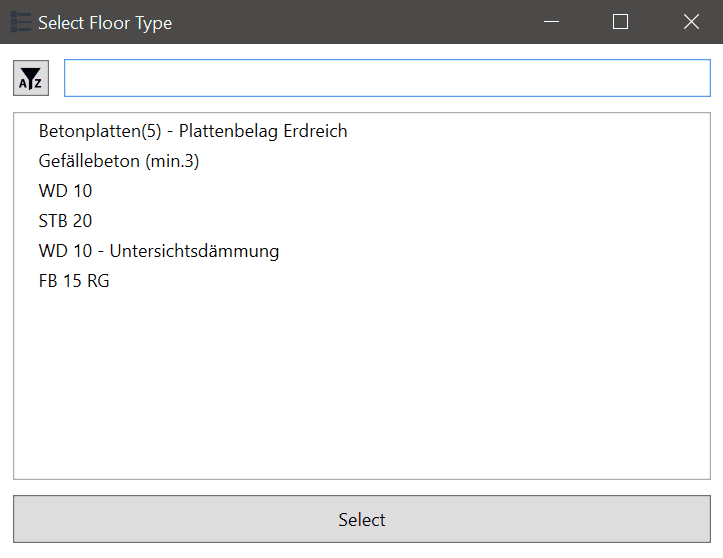
6. Text Input
TextForm is another very simple form. It allows users to enter text into a dialog box that can be used in the code. This is useful for scripts that require the user to enter a certain value or text string.
↓forms.ask_for_string.py
from pyrevit import forms
user_input = forms.ask_for_string(
default='Default Value',
prompt='Enter Text Input:',
title='Custom Title')
print('Input: {}'.format(user_input))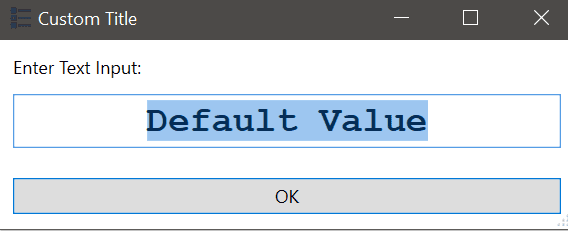
7. Conditions
🎭 Lastly, we can check conditions before running our script. It's often necessary to be in a certain ViewType or have selection in Revit for the script to run successfully. This is useful for ensuring that a script is only executed if certain conditions are met.
↓The condition checks pyRevit ships with.py
from pyrevit import forms
forms.check_workshared()
forms.check_selection()
forms.check_familydoc()
forms.check_modeldoc()
forms.check_modelview(revit_view)
forms.check_viewtype(revit_view, ViewType.DrawingSheet)
forms.inform_wip()
if not forms.check_workshared():
forms.alert('Document should be Workshared.'
'Please Try Again', exitscript=True)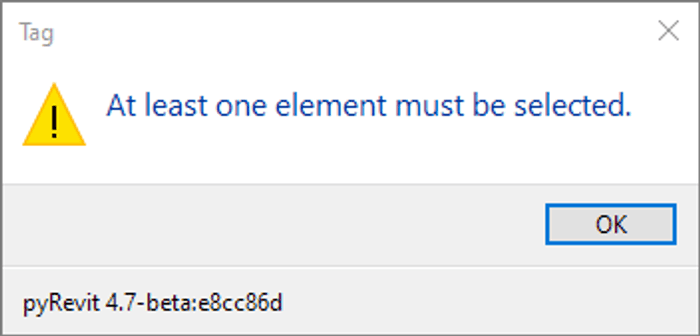
8. rpw - FlexForm
🎁 As a bonus I want to mention FlexForm from rpw. The rpw FlexForm is a powerful tool for creating custom forms in Revit and it is available in pyRevit by default!
✅ It allows users to create a custom form with multiple inputs, such as text boxes, dropdowns, checkboxes, and more. We can combine as many of them as we want and have a form with multiple input types in the order that we need.
↓rpw FlexForm with mixed inputs.py
from rpw.ui.forms import (FlexForm, Label, ComboBox, TextBox, TextBox,
Separator, Button, CheckBox)
components = [Label('Pick Style:'),
ComboBox('combobox1', {'Opt 1': 10.0,
'Opt 2': 20.0}),
Label('Enter Text #1:'),
TextBox('textbox1', Text="Default Value 1"),
Label('Enter Text #2:'),
TextBox('textbox2', Text="Default Value 2"),
Label('Enter Text #3:'),
TextBox('textbox3', Text="Default Value3 "),
CheckBox('checkbox1', 'Checkbox A'),
CheckBox('checkbox2', 'Checkbox B'),
Separator(),
Button('Select')]
form = FlexForm('Title', components)
form.show()
print(type(form.values)) #dict
print(form.values)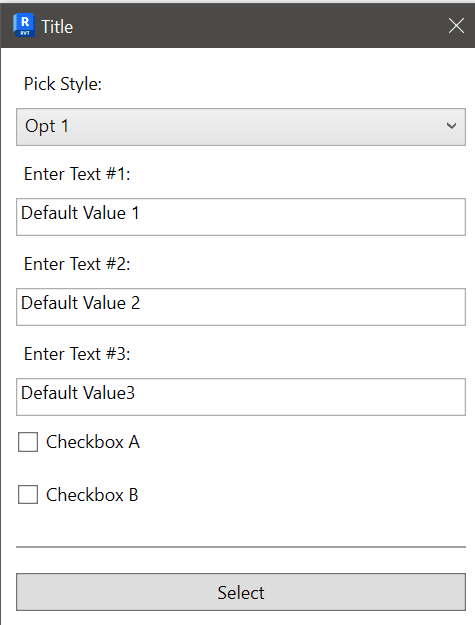
I hope it helps you understand how to use built-in forms within pyRevit. It's not that complicated and you can always refer to original documentation: